

Do you love decorating, design and vintage collectibles? If so, starting an antique booth could be a great way to use your creative energy while making extra money.
This post will talk about the initial setup of your booth.
This post contains affiliate links. See our disclosure for details.
Select your Antique Booth Space
When you are renting space in an antique mall, there are several size spaces that you can choose from. You can rent a small case or a large booth.
The space you choose will come down to what you are selling and how much rent you would like to pay.
If you are selling small items such as coins or jewelry, a case may be all you need. If you are selling furniture, you may want to opt for the booth.
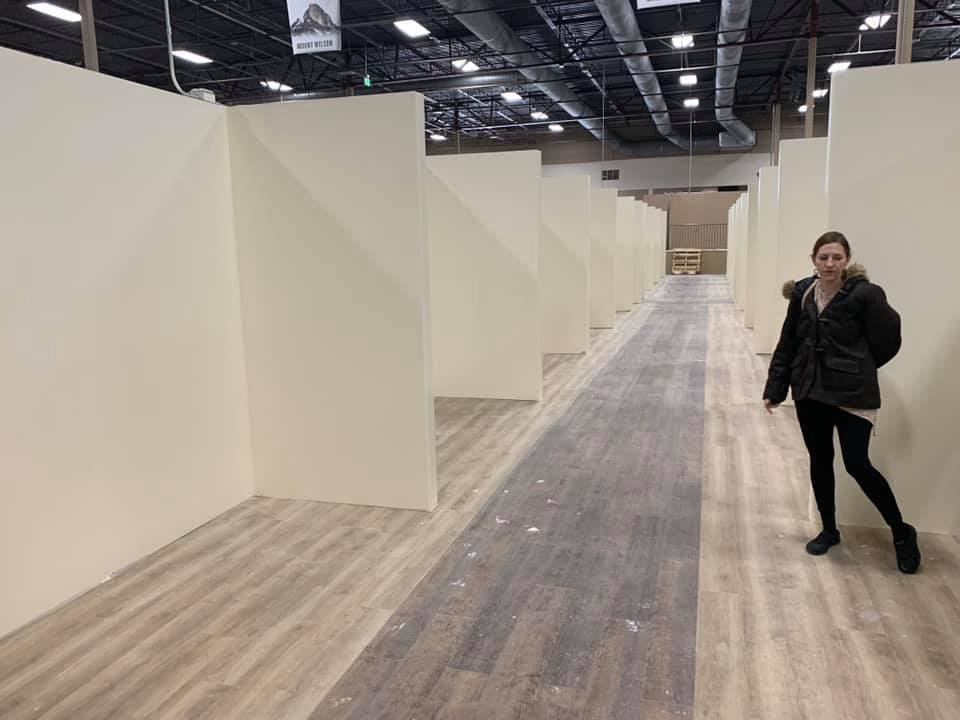
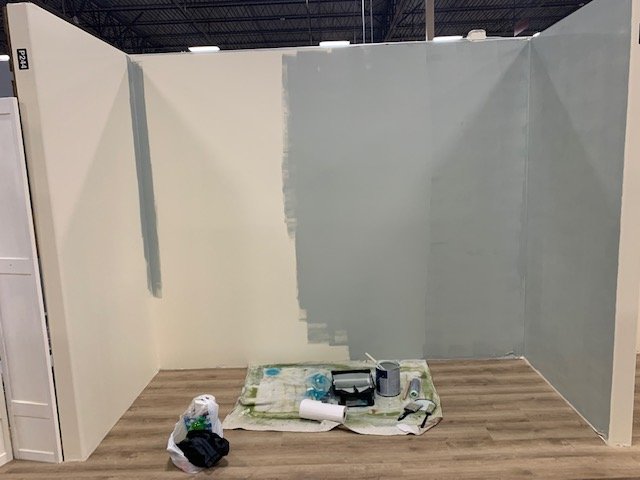
We were lucky enough to start from scratch at a brand new antique mall. Here is our 10ftx 5ft space before we added anything.
Envision your Space
The next step will be for you to visualize a plan. How do you want your antique booth to look? What style do you want to use?
There are so many different looks that you can use for your antique booth. Farmhouse style is very trendy. Country, retro and mid-mod are some other styles to look in to.
I would recommend browsing Pinterest to search for different looks and antique booth displays that you like.
Going antiquing is another fun way to get the creative juices flowing.
Draw your Booth Plan on Paper
Plan out placement of any big items that you have. This will allow all furniture to fit properly in your antique booth space.
You may also want to think of buying a few items to display your products so they can be seen and ultimately bought.
Here are some things that you may want to use to display your antiques:
- A pegboard wall with lace curtains
- A slat board wall
- A crate wall
- Lattice
- Clothing Rack
- Necklace displays
- Jewelry displays
- Hooks to hang items from
- A chicken wire picture frame
- A curio cabinet
- Shelving
It is amazing how fast you can run out of room when you are planning out your booth!
We revamp our own furniture and only ended up having room for two pieces plus some shelving.
Prep your Area
Before you start moving in, take a look at your space and decide if there is anything you want to do with it.
Do you want to paint it? Add pegboard?
Built in shelving? Add a carpet?
We painted our booth vintage blue green. We didn’t add pegboards because our cabinets were going to take up most of the space.
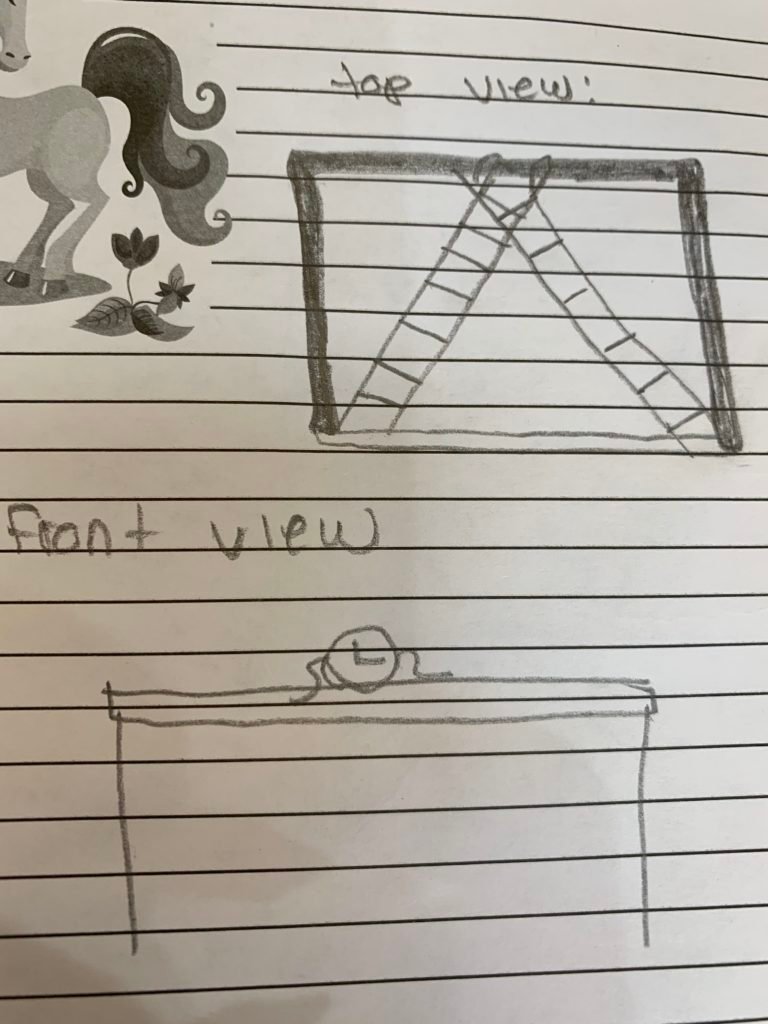
Add a Roof or Overhang
A roof or frame ties your space together and makes it look complete. We used furring strips to make a small ladder “v” shape. The options are endless for what you can do.

Add your furniture
Once your area is prepped, add your furniture and make any adjustments to your plan.
Now add and display your smaller items so they can be seen and everything is not too cluttered.
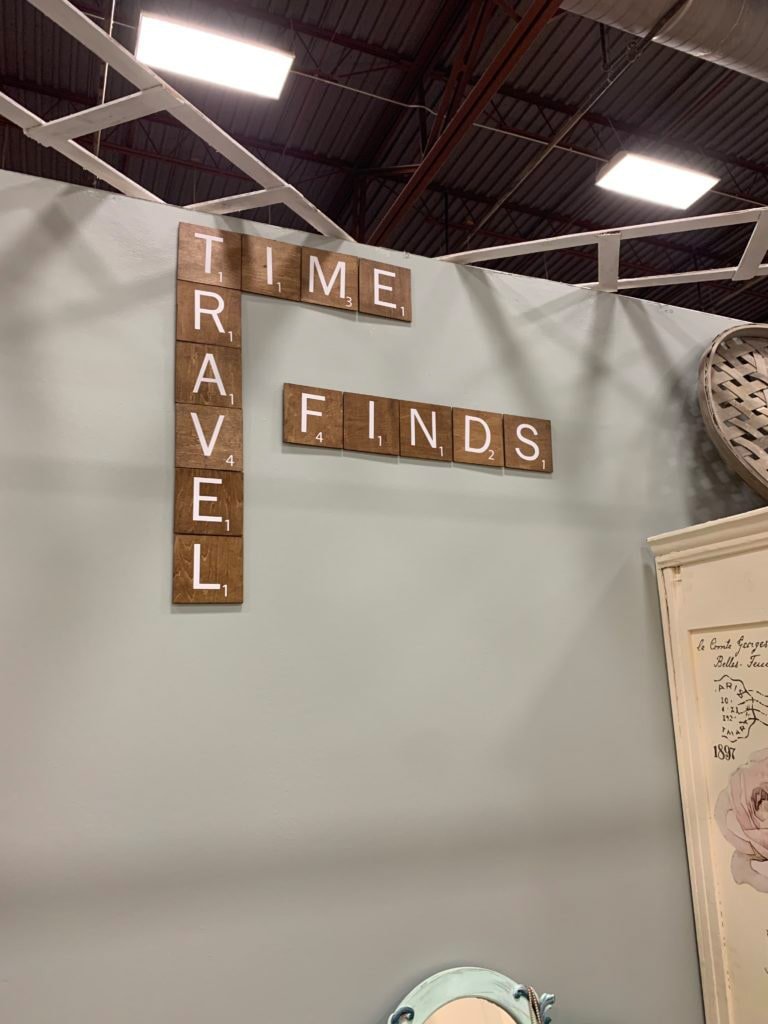
Add some marketing materials such as a business card, or a sign with your contact info. We sell Scrabble pieces so we have a card with our info as well as how to hang them.
How to Setup your Antique Booth: Add Lighting
If you have access to electricity, I would argue that lighting is the most important part of your booth. No one wants to go into a dark area and not be able to see all the treasures that surround them.
I added lights to two of our cabinets as well as string lights on our ladder ceiling. It made a huge difference!
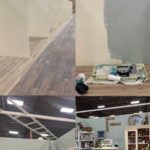
Here is our finished booth! We are opening May 9, 2020. (Right in the middle of the quarantine. How’s that for good timing lol)
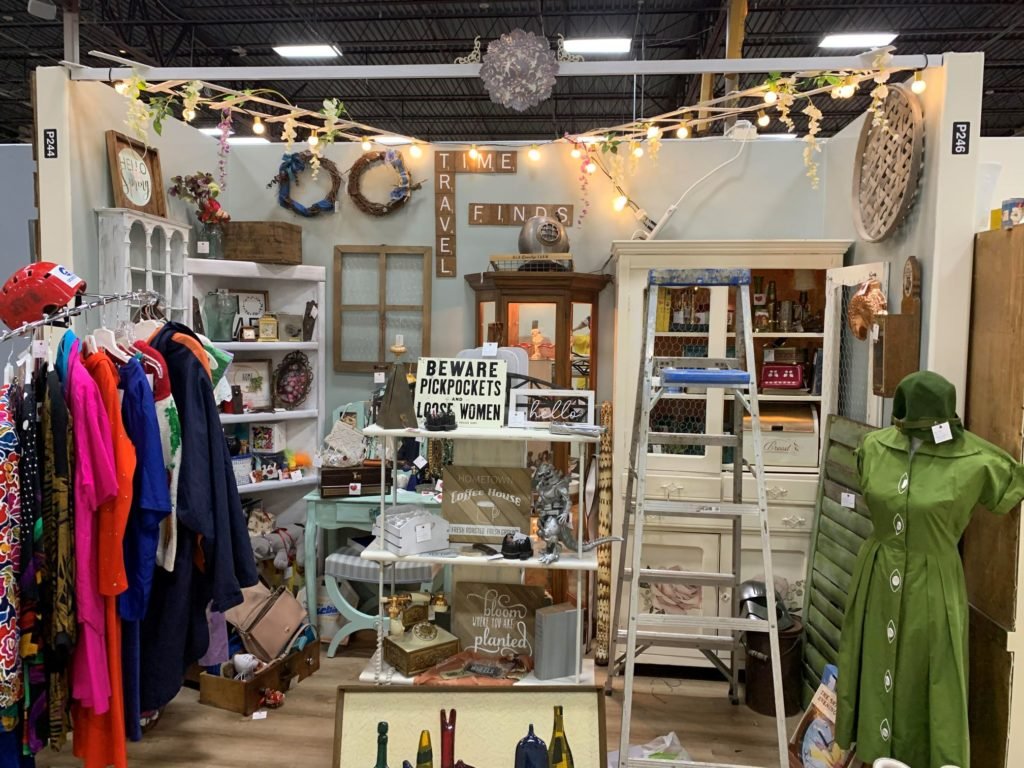
Here is our almost finished booth! We are opening May 9, 2020. (Right in the middle of the quarantine. How’s that for good timing lol)
As time passes, we will keep you updated on great booth displays and ideas, so be sure to sign up for our emails!


3 Comments
Comments are closed.